

ZeroAccess is a advanced kernel-mode rootkit also known as Sirefef, that is one of the most widespread threats in the current malware scene. ZeroAccess is ability to run on both 32-bit and 64-bit versions of Windows, resilient peer-to-peer command and control infrastructure and constant updates to its functionality over time show that ZeroAccess is a modern threat capable of thriving on modern networks and modern Operating Systems.
ZeroAcces is also capable of downloading other threats on to the compromised computer, some of which may be Misleading Applications that display fake information about detected threats on the compromissed computer and scare the user into purchasing fake antivirus software to remove the fake threats. It is also capable of downloading updates of itself to improve and/or fix functionality of the rootkit.
ZeroAccess used mechanisms that are themselves hard to remove such as a kernel-mode rootkit and patched driver files, patched system files such as services.exe and data hidden in NTFS Extended Attributes, removal of NTFS permissions on files used; and because ZeroAccess used several autostart points on an infected machine and usually other files that can re-install the malware.
For ZeroAccess there are many removal guides and tools for cleaning up a users system, in the first place I want to advice that you may better not using tools like ComboFix and TDSSKiller on your own if you don’t know how to use this tools. Wrong usage may result in a non-bootable system of problems with your internet connection because it wrecks the TCP/IP stack or removing important system files.

ZeroAccess removal – HitmanPro
ZeroAccess rootkit [Removal guide]
All tools used in our malware removal guides are completely free to use and should remove any trace of malware from your computer.
Please be aware that removing Malware is not so simple, and we strongly recommend to backup your personal files and folders before you start the malware removal process.
1. Run a scan with HitmanPro
Please download HitmanPro to your desktop from one of the following links
HitmanPro (32bit) – Direct download link
HitmanPro (64bit) – Direct download link
- Double click on HitmanPro to start the program, if you are experiencing problems while trying to start HitmanPro, you can use the Force Breach mode.
- To start HitmanPro in Force Breach mode, hold down the left CTRL-key when you double click on HitmanPro and all non-essential processes will be terminated, including the malware processes.
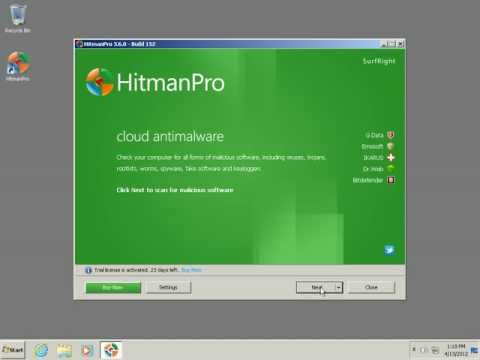
- HitmanPro will start and you’ll need to follow the prompts (by clicking on the Next button) to start a system scan with this program.
- The program will start to scan the computer. The scan will typically take no more than 2-3 minutes.
- Click on the next button and choose the option activate free license
- Click on the next button and the infections where will be deleted.

- Click now on the Save Log option and save this log to your desktop.
- Click on the next button and restart the computer.
2. Run a scan with TDSSKiller
Please download the latest official version of Kaspersky TDSSKiller to your desktop from one of the links below.
http://support.kaspersky.com/downloads/utils/tdsskiller.exe
http://support.kaspersky.com/downloads/utils/tdsskiller.zip
- If you can’t start Kaspersky TDSSKiller, you first need to rename it so that you can get it to run. Rename the executable from TDSSKiller.exe to iexplore.exe or svchost.exe, and then double-click on it to launch.
- Kaspersky TDSSKiller will now start and display the welcome screen and we will need to click on Change Parameters option.
- Check the boxes beside Verify Driver Digital Signature and Detect TDLFS file system, then click OK.

- Next,we will need to start a scan with Kaspersky TDSSKiller
- Click the Start Scan button to begin the scan and wait for it to finish.
- Warning! Do not use the computer during the scan!
- When it finishes, you will either see a report that no threats were found like below:
- If no threats are found at this point, just click the Report selection on the top right of the form to generate a log. A log file report will pop which you can just close since the report file is already saved.
- If any infection or suspected items are found, you will see a window similar to below.

- If you have files that are shown to fail signature check do not take any action on these. Make sure you select Skip. We will tell you what to do with these later. These may not be issues at all.
- If ‘Suspicious objects’ are detected, the default action will be Skip. Leave the default set to Skip and click on Continue.
- If Malicious objects are detected, they will show in the Scan results. TDSSKiller automatically selects an action (Cure or Delete) for malicious objects.
- Make sure that Cure is selected. Important! -> If Cure is not available, please choose Skip instead. Do not choose Delete unless instructed to do so.
- Just for Reference purposes, if you were to quarantine any detected objects, Quarantined files will not be removed! They are moved to a quarantine folder.
- The default quarantine folder is in the system disk root folder, e.g.:
- C:\TDSSKiller_Quarantine\23.07.2010_15.31.43
- After clicking Next, TDSSKiller applies selected actions and outputs the result.
- A reboot might require after disinfection, please reboot immediately if it states that one is needed.
3. Run a scan with Malwarebytes Anti-Malware
Download Malwarebytes Anti-Malware to your desktop.
- Double-click mbam-setup.exe and follow the prompts to install the program.
- At the end, be sure a checkmark is placed next to Update Malwarebytes’ Anti-Malware and Launch Malwarebytes’ Anti-Malware
- Then click Finish.
- If an update is found, it will download and install the latest version.
- Once the program has loaded, select Perform quick scan, then click Scan.
- When the scan is complete, click OK, then Show Results to view the results.

- Be sure that everything is Checked (ticked) except items in the C:\System Volume Information folder and click on Remove Selected.
- If you accidently close it, the log file is saved here and will be named like this: C:\Documents and Settings\Username\Application Data\Malwarebytes\Malwarebytes’ Anti-Malware\Logs\mbam-log-date (time).txt
- Note: If MBAM encounters a file that is difficult to remove, you will be presented with 1 of 2 prompts.
- Click OK to either and let MBAM proceed with the disinfection process.
- If asked to restart the computer, please do so immediately. Failure to reboot will prevent MBAM from removing all the malware.
- After the restart in Normal mode, start Malwarebytes Anti-Malware again and perform a Full System scan to verify that there are no remaining threats.
4. Information
Some of the programs that we used in our malware removal guides would be a good idea to keep and used often in helping to keep the computer clean. Malwarebytes Anti-Malware is one of the most powerful anti-malware tools. It is totally free but for real-time protection you will have to pay a small one-time fee. The license of Malwarebytes Anti-Malware is life-time so you have to buy it once, and because Malwarebytes Anti-Malware is a great addition to your regular virusscanner of security programs.All tools used in our malware removal guides are completely free to use and should remove any trace of malware from your computer.
Please be aware that removing Malware is not so simple, and we strongly recommend to backup your personal files and folders before you start the malware removal process.
ZeroAccess removal video
Incoming search terms:
- zeroaccess rootkit removal
- zeroaccess removal
- how to remove zeroaccess rootkit
- remove zeroaccess rootkit
- zeroaccess rootkit removal tool
- zero access rootkit
- zeroaccess
- rootkit zeroaccess
- how to remove zeroaccess
- ZeroAccess Rootkit Bleeping Computer
- anti rootkit bleeping computer
- zeroaccess rootkit removal windows 7
- fix for zeroaccess rootkit
- zeroaccess malware
- zeroaccess removal tool